Adding Selenium to a Java project with Maven and automating web page interactions.
So far we have a Java project using Maven running inside of Visual Studio. We know how it works, how to change it, and how to run the program. Lets get started on making it do something cool.
Installing Selenium Webdriver
For web automation, we’re going to use a tool called Selenium WebDriver. This is an industry standard tool that has a hellacious, almost unfathomable amount of tutorials available. Seriously – I think the amount of Selenium content available on the web cannot be consumed within a person’s lifetime. The tool has support for most languages and debugging help available all over the web. Lets give it a spin.
The Selenium WebDriver installation guide is short and sweet. Click the Java tab and copy over the code block.
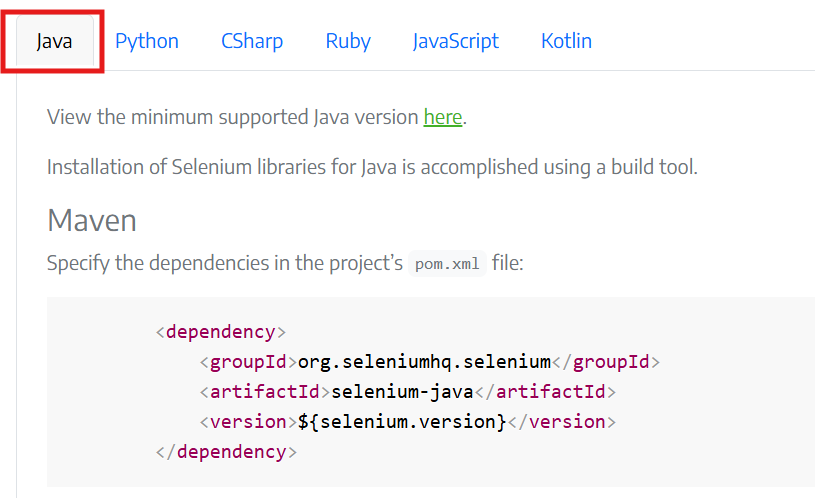
Per the guide, we need to add this to the pom.xml file. This is the file that tells Maven how to manage dependencies and build the project. Lets open up that file and copy in the code.
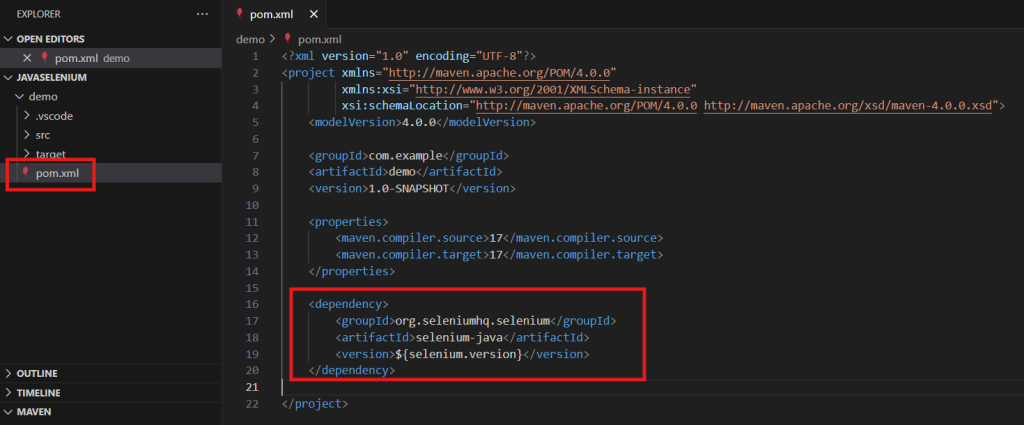
Now we run mvn compile using the command line or VS Code controls, whichever you prefer.
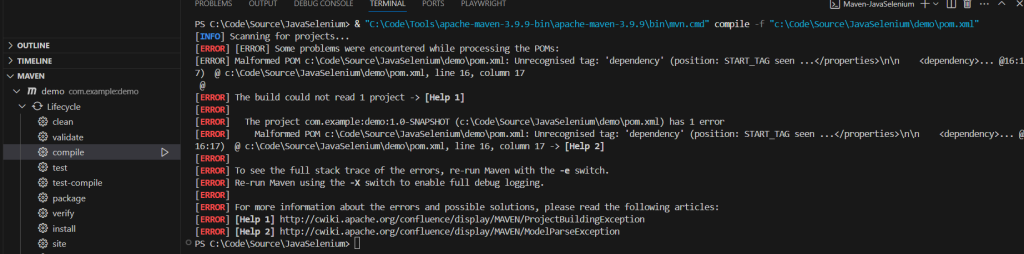
…What? The build failed? It’s a personal pet peeve of mine when guides are missing the context needed to give the user a solid understanding of what is happening. The amount of hours I’ve wasted trying to follow along and search for information to explain my errors is disheartening. This is from the official Selenium guide! It’s using patterns that aren’t made clear to the user and can end up confusing people and turning them away. It’s important to me that this guide teaches you what is happening and how to fix issues that you come across.
So what does this error mean? The text is here:[ERROR] Malformed POM c:\Code\Source\JavaSelenium\demo\pom.xml: Unrecognised tag: 'dependency' (position: START_TAG seen …\n\n … @16:17) @ c:\Code\Source\JavaSelenium\demo\pom.xml, line 16, column 17
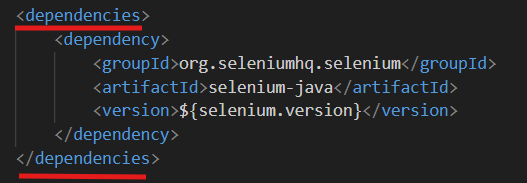
The error seems to be related to the dependency tag being unrecognized, which we can read about more in the Maven documentation. If we search on the page for the term dependency we can see a few examples of the dependencies within context. We can see, every time, that the <dependency> tag (that is, a text wrapped in brackets like so <>) is preceded by a <dependencies> tag. It’s followed by a </dependencies> closing tag. These mimic HTML tags in this way of organizing information. So, wrapping the tags should give us this.
Lets try mvn compile again.

Inconceivable. Yet another issue. This time there is some problem with that ${selenium.version} business. What is it trying to do? Intuiting the immediate purpose of the line, we’re trying to specify the version of Selenium that is to be used. When we search the Maven site for Selenium, we can see these are the versions available for download. Why so many? Different programs may rely on specific compatibilities to work correctly. In our case, we can probably grab the latest one. For example, my line looks like this: <version>4.32.0</version>
One more try, with feeling? Run: mvn compile

Finally, we stop seeing errors. If you are still seeing some, apply a curious mindset and keep investigating like we did before. Once working, the Maven command downloads and includes the data necessary for our program to run Selenium commands. So what was up with ${selenium.version}? If we had multiple dependencies related to Selenium and we wanted to keep them all in sync on the same version, this pattern would enable us to update one place and apply it everywhere. We can use this pattern with a <properties> section in our pom file and creating a <selenium.version> tag that resolves to whatever number we would like. However, that is overkill for this type of project and knowing when and where to apply these patterns is half the battle.
Starting a Selenium Session
The Selenium getting started guide gives a great overview of the basic functionality. Lets break down the anatomy of a function with our first command:
WebDriver driver = new ChromeDriver();
WebDriver- The name of the data type. It describes that the ‘driver’ variable is a WebDriver. Programming objects are constructed by primitive data types. What is a WebDriver? More on that later.
driver- The variable name. We can substitute it for any place that we want the value of everything after the equals sign.
new ChromeDriver()- The instantiation of the object with the passed constructors (in this case, none). Note that you’ll need Chrome installed for this to work.
;- Communicating to the computer the end of the line of code – this is a complete ‘thought’.
Hold on, what did any of that mean?
Although this guide is intended to be a thorough walkthrough, I’m going to start using a lot more programming terms from here on out. To keep this from getting too verbose, I can’t explain every single term I use. I’ll keep giving some general definitions and linking more information as possible, but if you have absolutely no programming experience you should read my Key Programming Toothbrushing Concepts article first.
The second function will help us make some sense of the first.
driver.get("https://www.selenium.dev/selenium/web/web-form.html");
driver: We’re calling a reference to that object we created in the first function. Everything that comes after the period is using this object for context.get(...); : This is telling the aforementioneddriverthat it is going to navigate to the url within the string function parameter (sometimes called an argument), denotated by quotes.
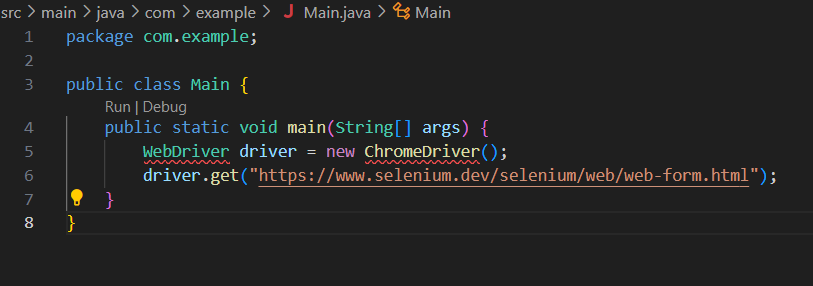
So, looking at the whole operation, this WebDriver object called the driver is being set to be a ChromeDriver. To be brief, these objects contain the information necessary to perform web automation. Then we tell the chrome window to navigate to that webpage. Lets add them to our Main.java class and see what happens!
Another error! But this is one found at compiler-time, thanks to the help of our IDE. In this case, the program has no idea what WebDriver and ChromeDriver are. To be fair, at this point neither do we. We can give a program context for what these are with import statements. Include these at the start of the program:
- import org.openqa.selenium.WebDriver;
- import org.openqa.selenium.chrome.ChromeDriver;
Here is my final code, for reference. To run this code, you can click the run command in the IDE.

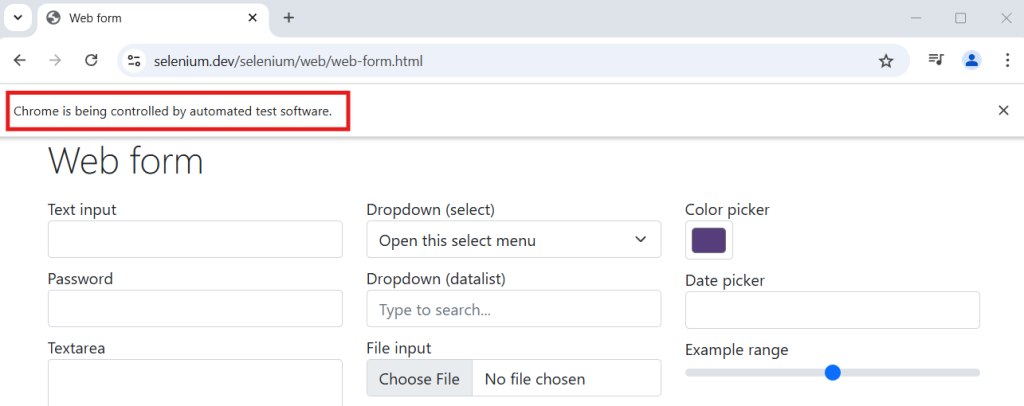
If all went well, you should see a newly opened browser on the page that we passed into the function!
Identifying Elements with XPaths
Lets do something interesting with this new tool! Bear with me here, we’ll need to pick a simple website that doesn’t change often. How about Wikipedia? Lets search for a term and click on an article.
Lets start by changing that URL to “https://en.wikipedia.org/wiki/Main_Page“, the Wikipedia main page. Next we’ll need to define a WebElement to interact with.
WebElement searchbar = driver.findElement(By.xpath(""));
WebElement: The object type for web elements. These will represent textboxes, buttons, checkboxes, that sort of thing.searchbar: The name of the element, in this case the search bardriver.findElement(…): This tells the driver to search for an onscreen element matching the query that was providedBy.xpath(""): TheByclass tells the program the way that we can identify onscreen elements. For this guide, I’ll be using xpaths since they are easy to understand by reading them and provide the most flexibility of any of the types. We’ll get into that in-depth in a moment.
Additionally, we’ll need more include statements for these new functions. Going forward I won’t be spelling these out as much.
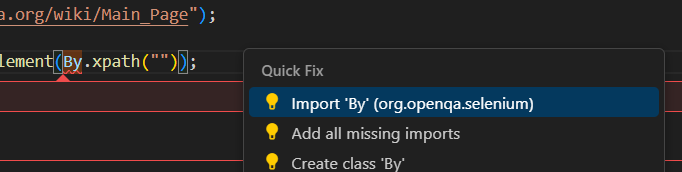
- import org.openqa.selenium.By;
- import org.openqa.selenium.WebElement;
The next step is to find the xpath for these two elements, the search textbox and the search button. If you right click the element and click “inspect” in the context menu (or press F12) , it’ll bring up the chrome developer tools.

The devtools can be an overwhelming window, with lots of information that can be confusing if you don’t know whats happening. Lets focus on the important stuff.
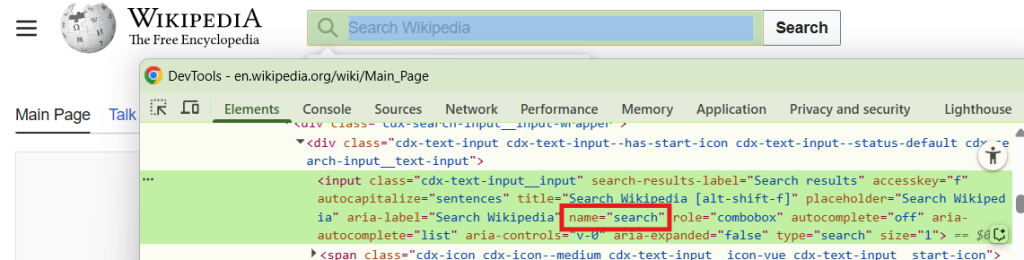
- The element that we’re inspecting is highlighted on the page in that green and blue.
- The DevTools window has the elements tab that contains the HTML of the underlaying page. The inspected element is highlighted here in green. If you poke around, you can see the structure of the webpage and how elements are nested inside of eachother.
- Elements have tag names at the beginning like div, span, or in this case, input.
- Each element has attributes (with values) like class, title, name, id. Those can vary greatly between elements. For this element the
nameattribute has the value “search”.
So what is an xpath? It’s a means of searching the HTML to filter down and find matching elements. The complicated nature of web pages makes it important to find a selector that specific enough to only get the one match that we want without it being so specific that any changes to the web page break it. Here’s an example of one:
//input[@name='search']
//input: This means to search anywhere on the page that has an input tag. A single slash/means a direct descendant.- If the query was
//input/div//spanit would mean for every input tag on the page, get the immediate div beneath it, then find all spans anywhere beneath that div.
- If the query was
[@name='search']: This is a filter that applies to the tag before it (input) and finds all of those tags which have a name attribute of “search”- There is a lot of room for creative filtering, such as using
contains. If it was //div[contains(@class, ‘test’)] then it would filter on every div whose class attribute contains the text “test”. This can make it possible to match on something where the attribute is long.
- There is a lot of room for creative filtering, such as using
Xpaths have a lot of nuance and tricks to them. A reference tool that I use is the xpath cheat sheet. I’ll keep dropping some tricks as we go along but if you’re stuck trying to get a good selector for a tough element, try a technique from this page. Let’s add that xpath to the DevTools by pressing ctrl+f and pasting it in.
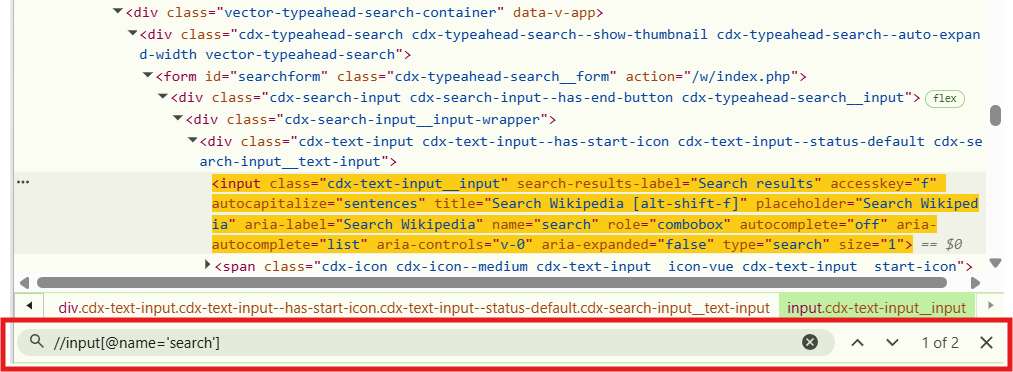
Although we see the yellow highlight around the correct element, we can see to the right that there are two matching results. This is fine in this situation because the findElement function will always return the first match, but if we wanted to get the second one we could have issues. Lets try to get something earlier in the tree to anchor on. At a glance, it looks like the form tag has an id that we can use.
What should that selector look like?
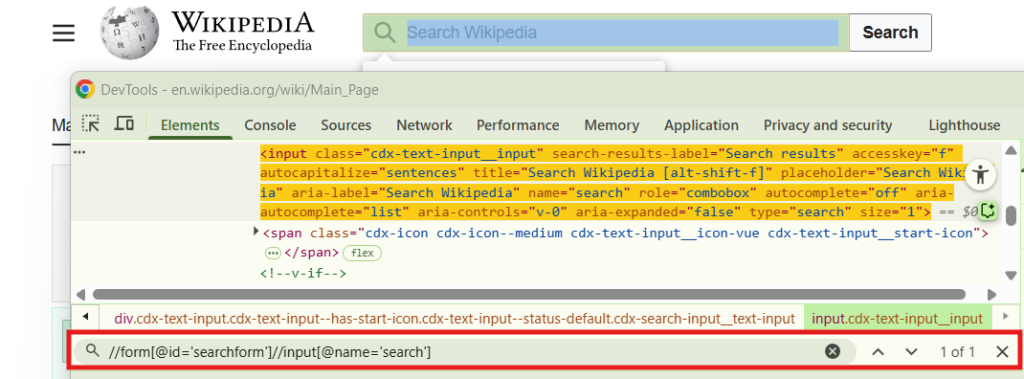
Since we want to search for something before the input tag, add //form to the front of the xpath. Then, we’re filtering on the id of “searchform” so we need to add [@id="searchform"]. Our final xpath should be: //form[@id='searchform']//input[@name='search']
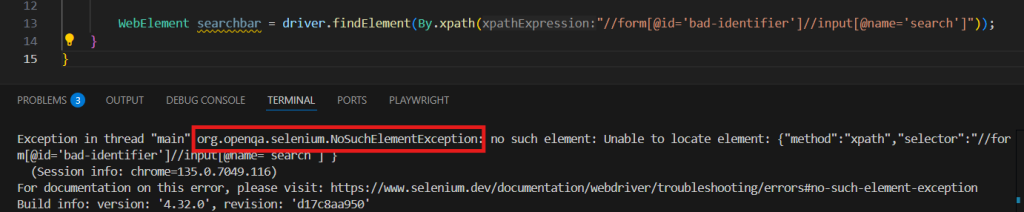
With that string added to the By.xpath(...) function, we’ve created code that will identify the search box for future automation. If there was some issue with our xpath, we would see an error like this:
Now that the hard work of getting the program to identify the element is done, let’s explore what Selenium lets us do with it.
Automating WebElements
The easiest way to see what options are available is with a form of code completion called IntelliSense. If we type out the searchbar variable and add a period afterwards, we can see the available functions start to filter in.
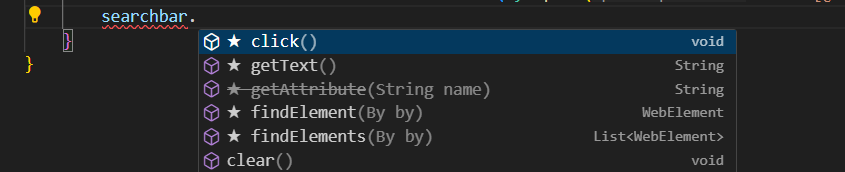
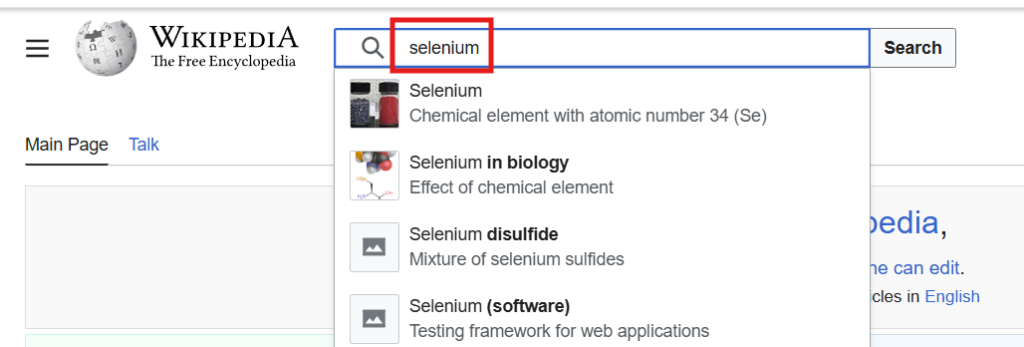
There is a lot here! For a full list with detailed documentation, you can check the Selenium JavaDocs. I’ll explain some of the important ones. Our goal was to type in a search term, and we can do that with the sendKeys("...") function. The string parameter inside of it is the text we want to type. Enter “selenium” and let’s see what happens when we run it this time.
Did you get an ElementNotInteractableException? Regardless, this is a great opportunity to explain element visibility and viewport sizing.
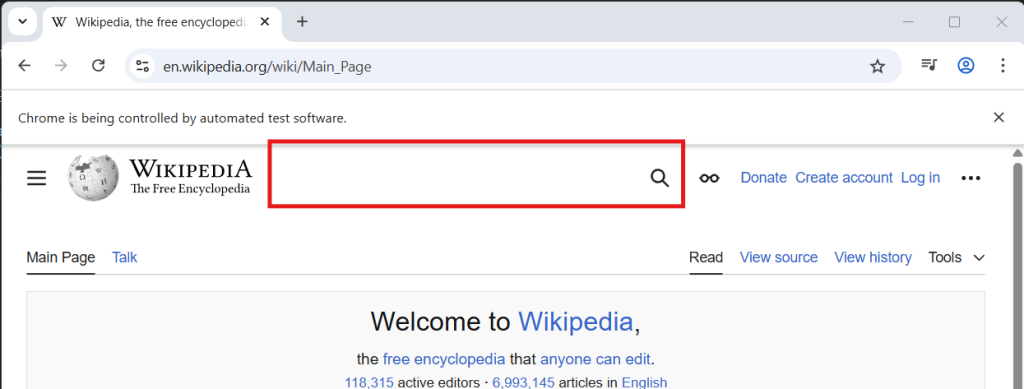
Depending on how large your window is, you might not have the searchbar visible on a new window of the wikipedia main page. Seriously – take a second to move around the width of the window and watch things appear and disappear based on the size. Alternatively, if we click the search button (with the magnifying glass) we can make the search box appear. However we choose to make the search box visible, it’s critical to make a consistent test environment. Web automation is full of these kinds of snags. In this situation, I recommend maximizing the browser with this line and trying again:
driver.manage().window().maximize();
There are a lot of other useful tools in the manage() and window() IntelliSense menu; I’d recommend exploring them as well.
Why don’t these functions have parameters?
They don’t need any! Sometimes we’re blessed with simple answers. Think of it like this – we have the driver. We call manage() to get the interface that contains functions to manage the driver. There is no information needed to be passed into the function call to get that information. The same goes for the window() interface. Once we have that in context, we can call the maximize() function to do the actual maximizing of the window.
Why doesn’t driver have any parenthesis while the others do?
Excellent question! Because driver is an object that already exists, we don’t need to pass in any parameters. Once we call functions from it, they operate within the context of itself. More on functions and objects to come.
With the browser maximized, lets try typing selenium into the search box again:
Fantastic! Now we need to follow the same process for that search button:
WebElement searchbutton: The name of the new element.driver.findElement((By.xpath...)): Finding that element."//form[@id='searchform']//button[text()='Search']": The new xpath, using the element text as a filter.
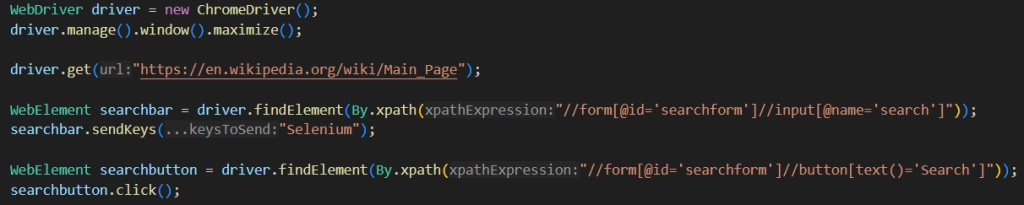
With those components assembled, we can then use searchbutton.click() to actually click on the search element. My code, at this point, looks like this:
And what happens if we run the code? Likely, you’ll get this error:

This is the dreaded Stale Element Exception. Basically, this means that the page has changed between when we found the element and when we try to interact with it. Within the microseconds? Yes. When we type into the searchbar there is a search result window that appears beneath the box. This is messing up the page enough that we need to get the element again. It’s also possible that the click goes through before the state change or the fetch happens after the results window appears, meaning that we don’t get any error. But again, consistency is key.
The simplest way to make this more consistent is to add a short wait to the script, allowing a second for the page to update before we try to get an element off of it. In Java, the Thread.sleep(...) command tells the computer to wait as many milliseconds as you pass into the function. In our case, since 1 second would be 1000 milliseconds, pass in 1000 to the sleep() function.
Is there a better way to wait?
Yes. In fact, this is the least efficient way to wait. If it only takes 0.1 second for the page to be ready to click, then we’ve wasted 0.9 seconds. Although that doesn’t seem like much, if we’re running hundreds of scripts then it can turn into hours of wasted time. A smarter way could be to wait until the search result box appears first, or even to retry the click until we don’t get that exception. These methods are much more complicated, so we’ll get into it later.
Once you add that, you’ll probably get a heads-up that you need to add a throws declaration. That’s a modifier to the function telling the program that you might see this issue.
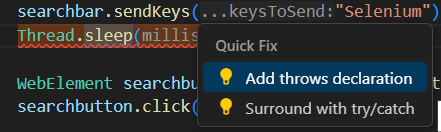
It’ll add that to the beginning of the function, making it look like this:

Adding a Validation
Once that’s dialed in and the click is going through, let’s find some way to verify that it was successful. For navigations like these, I like to use the URL to validate my script.
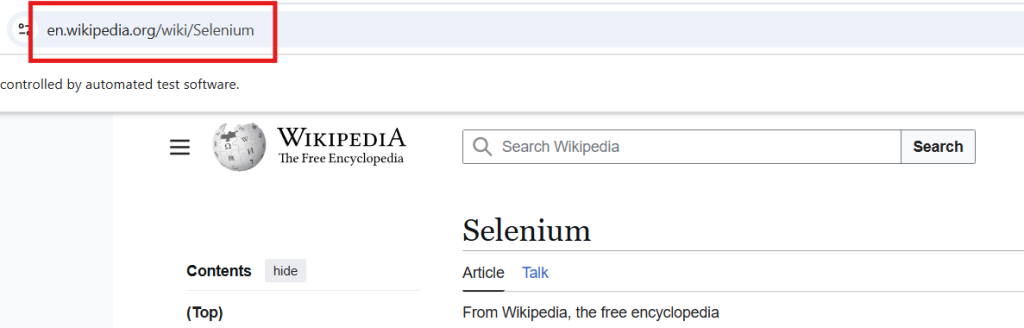
We can use Selenium to get that with driver.getCurrentUrl(), which returns the URL text as a string. Calling .equals(...) afterwards with the URL as a function parameter will give us a boolean value (true or false) that we can setup as an if statement. Basically:
if (driver.getCurrentUrl().equals(...) {do something}
An if statement performs everything inside the {} brackets if the statement is true. If the current URL equals the expected URL, we can type some message to let us know it worked. Do you recall that hello world line from our practice program? Lets use that within the brackets:
System.out.println("The page is loaded");

Voila! To make sure you didn’t get lost, here is the full text of my program:
package com.example;

import org.openqa.selenium.By;
import org.openqa.selenium.WebDriver;
import org.openqa.selenium.WebElement;
import org.openqa.selenium.chrome.ChromeDriver;

public class Main {
    public static void main(String[] args) throws InterruptedException {
        WebDriver driver = new ChromeDriver();
        driver.manage().window().maximize();

        driver.get("https://en.wikipedia.org/wiki/Main_Page");

        WebElement searchbar = driver.findElement(By.xpath("//form[@id='searchform']//input[@name='search']"));
        searchbar.sendKeys("Selenium");
        Thread.sleep(1000);

        WebElement searchbutton = driver.findElement(By.xpath("//form[@id='searchform']//button[text()='Search']"));
        searchbutton.click();

        if (driver.getCurrentUrl().equals("https://en.wikipedia.org/wiki/Selenium"))
        {
            System.out.println("The page is loaded");
        }
    }
}
That’s the basics of using Selenium for Web Automation! There is a lot of depth and nuance to the tool, so don’t get discouraged if you can’t figure out how to make something work. We’ll be getting into more advanced stuff soon. Try making a little script for a website that you like! Make a bot that signs up your friends for spam emails. Get creative!
Leave a Reply