Installing Java, a compiler, and a running a project in a windows environment.
Installing Java
Java is a very popular programming language, but why do so many people use it? It’s considered “high-level“, meaning that it doesn’t require “low-level” knowledge of the operations of a computer to use. But Java has a syntax similar to C, a low-level programming language, meaning that we can communicate what we want the program to do very explicitly. It’s a great language to learn how to program with.
So what version of Java do we use? Another excellent question – there are a lot of options. For support of desktop applications and some old, deprecated features, Java 8 is recommended. Newer versions of Java are provided through OpenJDK, an open-sourced version of the Java Development Kit, resulting in multiple providers of Java. For this example, I recommend using Java 21, since it is the latest long-term-support (LTS) version. I sourced my version from Adoptium, and selected the right version for my computer.
Which version is right for me?
There are a ton of options here, so lets break them down:
I selected Windows, which is my operating system. You may be on Mac or Linux.
Then, I need x64 for my computer architecture. Yours is likely x64 as well.
JDK stands for Java development Kit, versus Java Runtime Environment.
Lastly, msi is for a Microsoft Software Installer, instead of a ZIP file. An MSI file will guide you through the install process, and a ZIP just gives you the files that you need.
No matter what you do, you’ll need to make sure a few things are present.
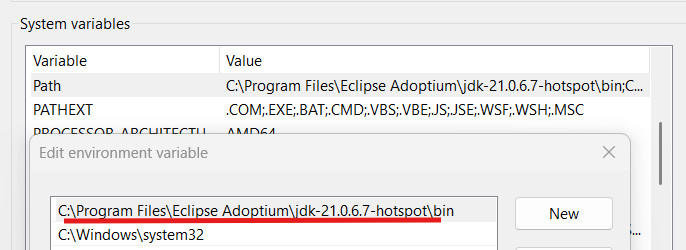
First, the Java files. These will be wherever you installed them, in my case it was at: C:\Program Files\Eclipse Adoptium\jdk-21.0.6.7-hotspot. Note that the bin folder is present.
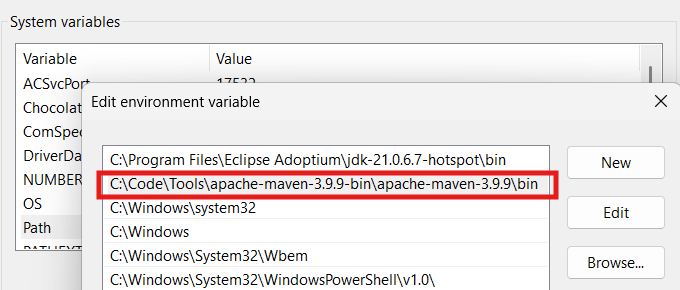
You’ll then need to verify the environment variables are setup correctly. The location of that aforementioned directory is relevant to the system, so if you’re on windows, search for Environment Variables or navigate to the System Properties Panel. Click on the Environment Variables button:
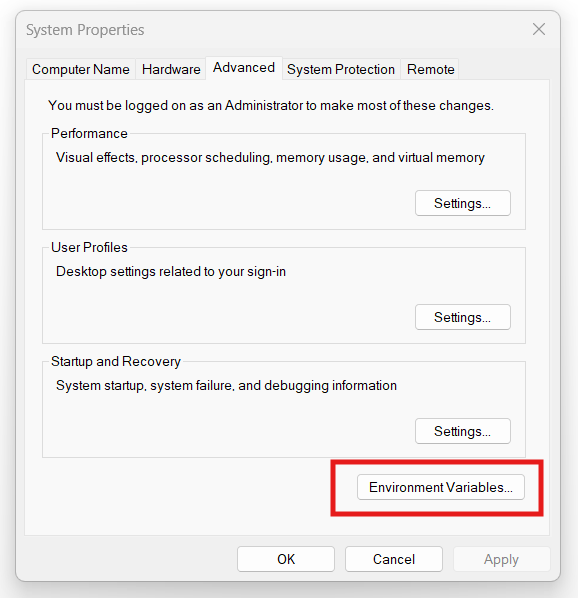
In the system variables section, make sure that the Path variable has the entry for the java location to the bin directory. Some guides may have you set a %JAVA_HOME% variable, which this just redirects to this.
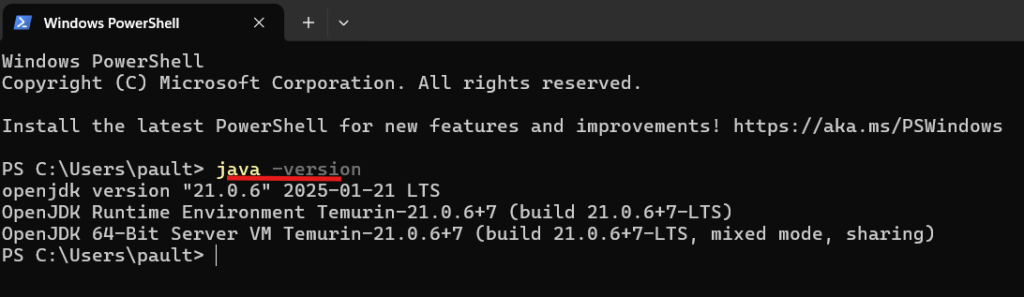
In order to verify that java installed correctly, you can open a terminal (command prompt, powershell, etc) and type java -version. The version you installed should display.
Congrats! These are the fundamentals of setting up Java. If there are issues, try researching your error codes or reaching out to me to update this guide.
Setting up Maven
Maven is a tool that streamlines the process of including plugins, building, and exporting your code to be used. We’ll be following the same pattern as the java install.
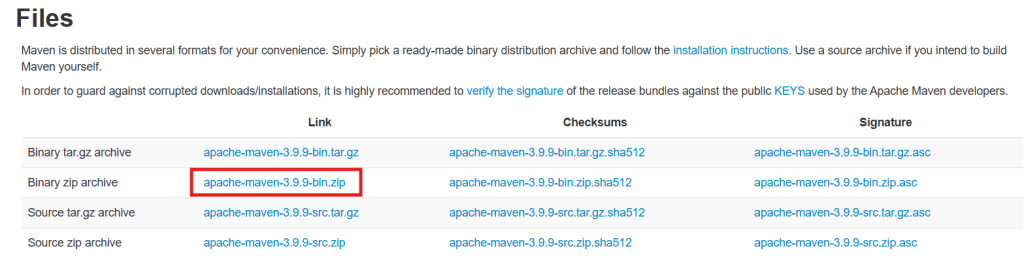
You can download it here: https://maven.apache.org/download.cgi
The install guide is here: https://maven.apache.org/install.html
Select the correct version for you – you probably want the binary zip.
Then unzip the files and add the directory to your bin, just like we did with Java.
To verify the installation, open terminal and call: mvn verify

Setting up Visual Studio Code
Now that we have Java installed, we need a place to actually edit a program. An Integrated Development Environment (IDE) gives us handy tools for writing programs. There are tons of options out there, ranging from thousands of dollars for complicated tools to editing plain text using notepad. While I don’t recommend the latter, I do recommend people use Visual Studio Code for being free, well-maintained, and community supported with lots of extensions for any kind of development you may want to do.
Downloading and installing VSCode is very simple, just follow the correct install link: https://code.visualstudio.com/download
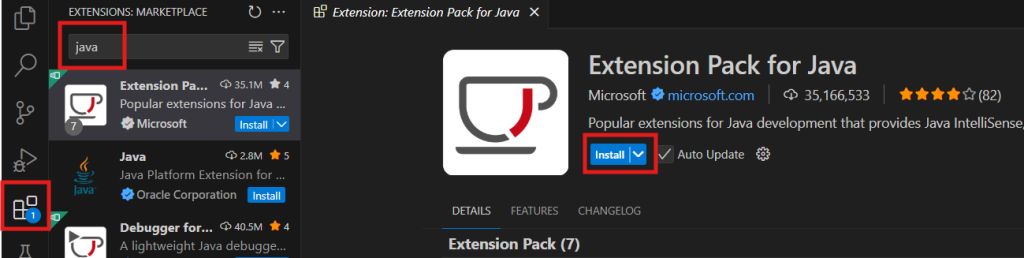
Then click the extensions tab, search for “java”, and install the java extension pack.
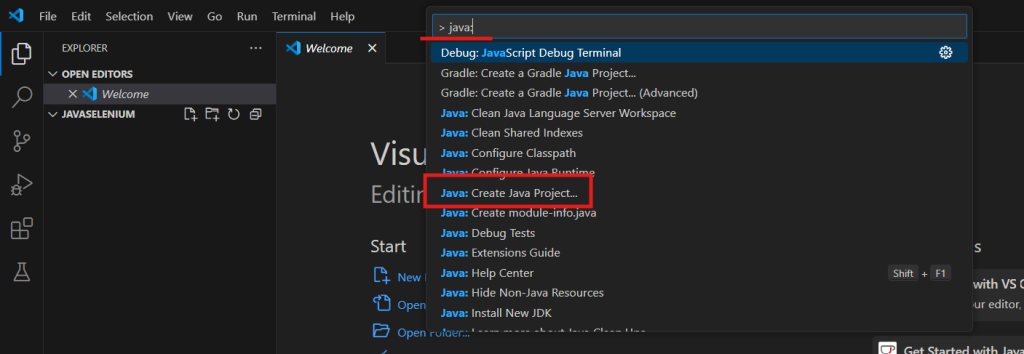
Then, using the search bar at the top of the window, search for “> java: ” to show java related commands. Pick the Create Java Project option.
You’ll get prompted for a few options. Select Maven -> No Archetype -> then name the project whatever you like. The Archetypes can set up the basic framework for different types of projects, but for now lets keep it simple and understand exactly what’s doing what.
Using Java to compile, package, and run the program
Now that we have a project created, in order to run it we need to do a few more things. When programming, we need to compile (often referred to as build) our code before we use it. This accomplishes a few things:
- Makes the code machine-readable: Our written code needs to get turned into 0s and 1s for the computer to interpret and execute. Every language does it a little bit differently, and every computer reads a little bit differently. You wouldn’t want to have to do that yourself, would you?
- Checks for compile-time errors: If there are any typos or mistakes with the human-readable code, the IDE (assuming you didn’t actually use notepad) should let you know if there are variable mismatches or missing functions.
- Allows us to run tests: The other type of error you can get is called a run-time error. Just because our code doesn’t have any compile-time errors doesn’t mean that the logic actually works. Think of it like this: even though we can say A÷B is a valid equation, we can’t if B=0. Once the code is compiled, we can tell the machine to run unit tests to make sure that our logic works. In this example, we would pass in values for B like ‘-1’, ‘0’, ‘100’, ”, and ‘🤠’ to make sure that the program handles those scenarios without an error.
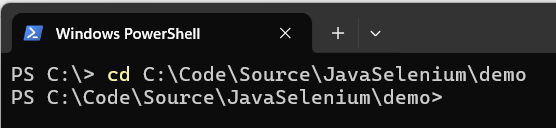
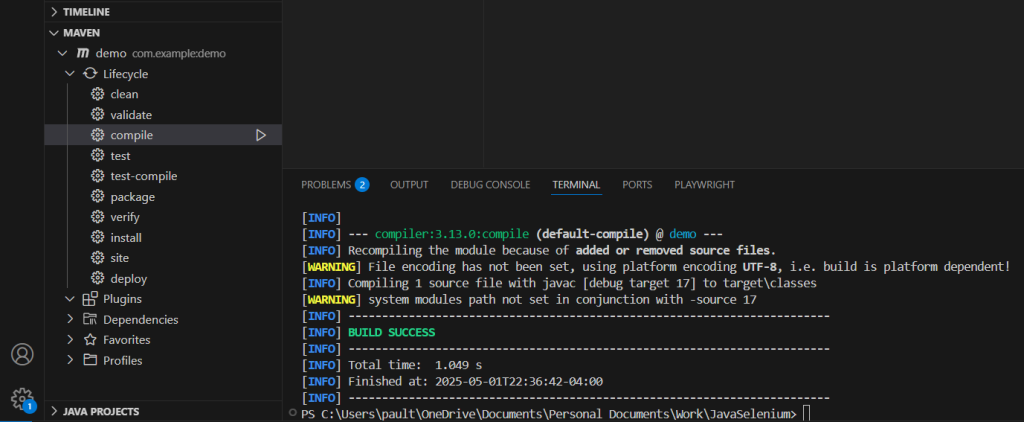
Lets try compiling our code. In a terminal window, navigate to your project directory. There are lots of ways to accomplish this, but for my example, I used the command cd C:\Code\Source\JavaSelenium\demo
In the last section we set up maven to do our building. Call it with mvn compile
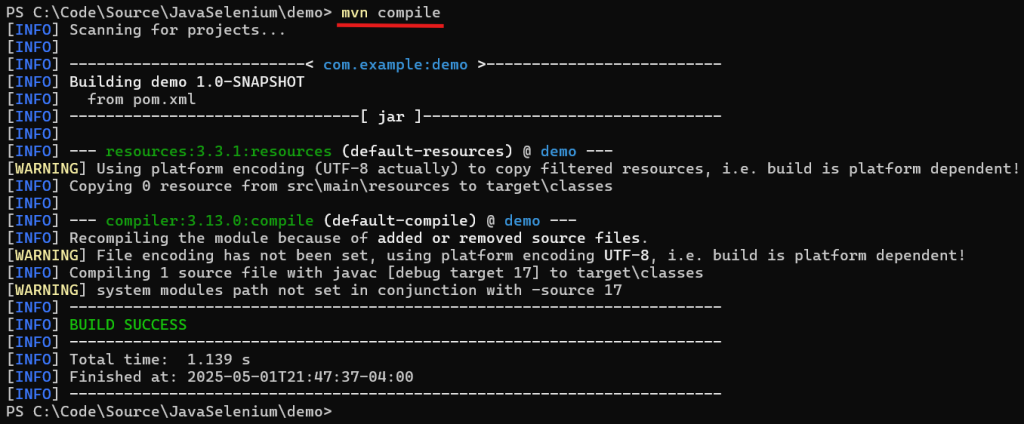
Hopefully you got a success too! If not, there are lots of maven tutorials out there that can help. Maven has a few other commands you can run, but the next one for us is mvn package
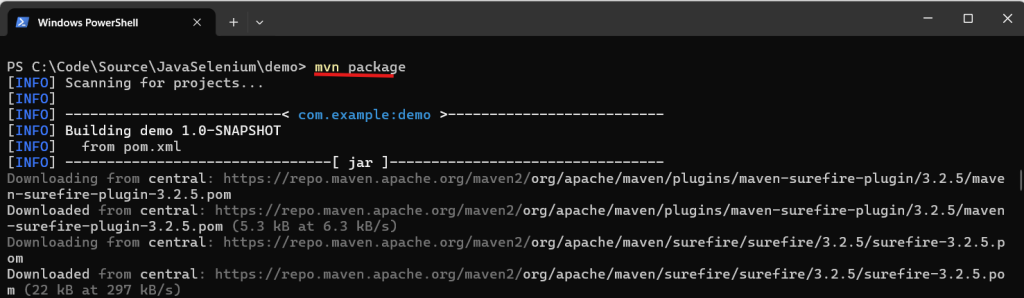
BUILD SUCCESS at the end.Packaging is a term that has a specific meaning in Java, but can be used colloquially to refer to collecting all of the necessary files together to get the program to run. It’s sort of like if you had to move; You need to assemble a smaller list of items (telephone, clothes, toothbrush) from your greater collection of stuff to keep with you while you’re between two places. Although you have an IDE, Java, Maven, and Baldur’s Gate III installed on your computer, all that you need to get your program running elsewhere is what’s inside this package. (And Java on the target machine, but that’s a deep dive back into compiling that we don’t need to do right now.) Ultimately, Maven delivers us that package in the form of a .jar file.
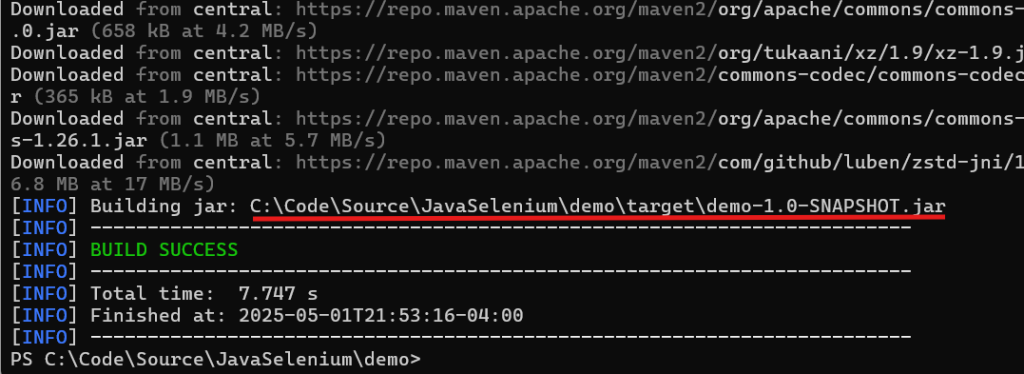
BUILD SUCCESSTo run the program, we can call java -cp path/to/jarfile.jar com.example.Main

java- Tells the computer to use java to read this command
-cp- Refers to class path
C:\Code\Source\JavaSelenium\demo\target\demo-1.0-SNAPSHOT.jar- The path to the packaged .jar file
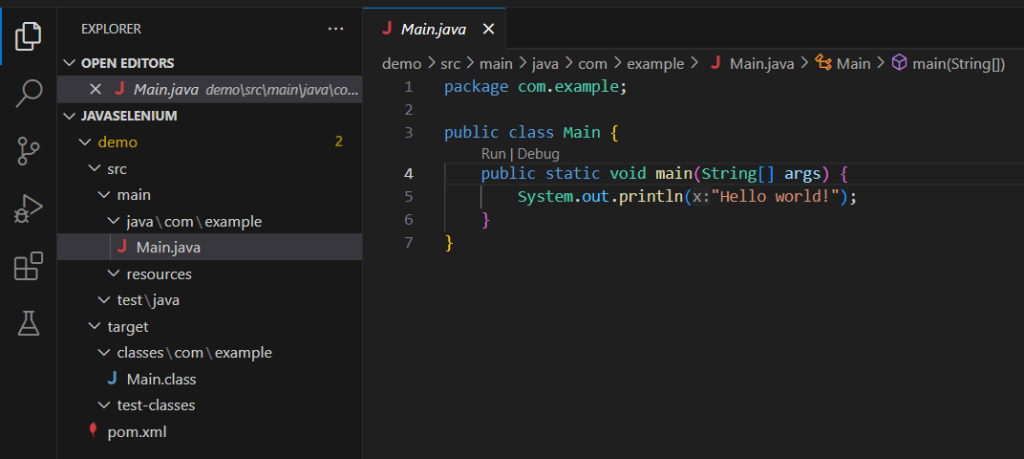
com.example.Main- The path within that .jar file to the class that we’re running. See your project structure? Note the path to the Main.java file that we are running:
...\demo\src\main\java\com\example\Main.java
- The path within that .jar file to the class that we’re running. See your project structure? Note the path to the Main.java file that we are running:
One final thing of note on the java program execution: Visual Studio Code has tools for running these maven commands internally. The Maven extension should be included in that java tools extension we got earlier. You could just click the compile button in the future.
And to add insult to injury, Visual Studio Code can also just run some functions outright! Note the RUN|DEBUG buttons next to the function – it’ll automatically link up the command line to execute this function, albeit a more convoluted way to run it than we did before (which may have been confusing if we didn’t set it up it ourselves first).

Lastly, there is an excellent tutorial from Visual Studio Code on the java setup if you come across any issues or have more questions.
Congratulations! That’s a fully executed java program. There is a lot that can be confusing at first, but carefully researching and understanding exactly what we’re doing and why we’re doing it will make this all seem logical. Play around with it a little bit and try displaying other text or printing numbers or that sort of thing. Live a little.
Leave a Reply